How to Use Veo 3 Lite: Complete Tutorial and Guide for 2026
Step-by-step tutorial for using Google Veo 3 Lite. Learn prompt writing, image-to-video, audio generation, workflow building, and advanced techniques.
Emma Chen · 15 min read · Apr 3, 2026
How to Use Veo 3 Lite: Complete Tutorial and Guide for 2026
Google's Veo 3 Lite has arrived, and it's one of the most exciting developments in AI video generation this year. As a streamlined, accessible version of the powerful Veo 3 model, Veo 3 Lite puts professional-quality AI video creation within reach for creators, developers, and businesses of all sizes.
Quick Answer: Google Veo 3 is Google DeepMind's flagship AI video generation model, delivering industry-leading cinematic quality, synchronized audio generation, and precise text-to-video control. It's accessible via Google Labs and Gemini, with free and paid tiers available to creators worldwide.
But like any powerful tool, getting the best results from Veo 3 Lite requires understanding how it works, how to communicate with it effectively, and how to build workflows that maximize its strengths.
This complete tutorial covers everything you need to know — from your first generation to advanced techniques used by professional AI video creators.
Getting Started: Prerequisites
Before you begin, you'll need:
- A Google Account — Required for all Google AI products
- Access to Veo 3 Lite — Via Google AI Studio, Gemini app, or Vertex AI
- A modern web browser — Chrome or Edge recommended for the best experience
- Clear creative goals — The more specific you are about what you want to create, the better your results
For API users, you'll also need:
- Google AI Studio API key
- Basic Python or JavaScript knowledge (for code integration)
- A development environment
Step 1: Accessing Veo 3 Lite
Via Google AI Studio (Recommended for Beginners and Developers)
- Navigate to aistudio.google.com
- Sign in with your Google account
- Click "Create new prompt" or navigate to the "Video" section
- In the model selector, choose "Veo 3 Lite"
- You're ready to generate
Google AI Studio provides the cleanest, most direct interface for working with Veo 3 Lite. It shows you exactly what's happening under the hood and gives you access to all model parameters.
Via Gemini App
- Open gemini.google.com or the Gemini mobile app
- Ensure you have Gemini Advanced (required for video generation)
- In a new conversation, type a video generation request
- Gemini will automatically route to Veo 3 Lite for video requests
The Gemini app approach is more conversational and accessible for non-technical users, though it offers less fine-grained control than AI Studio.
Via API (For Developers)
import google.generativeai as genai

genai.configure(api_key="YOUR_API_KEY")

# Initialize the Veo 3 Lite model
model = genai.GenerativeModel("veo-3-lite")

# Generate a video
response = model.generate_content(
    "A golden retriever playing fetch on a sunny beach,
     4K cinematic style, 8 seconds",
    generation_config={
        "video_duration": 8,
        "aspect_ratio": "16:9"
    }
)
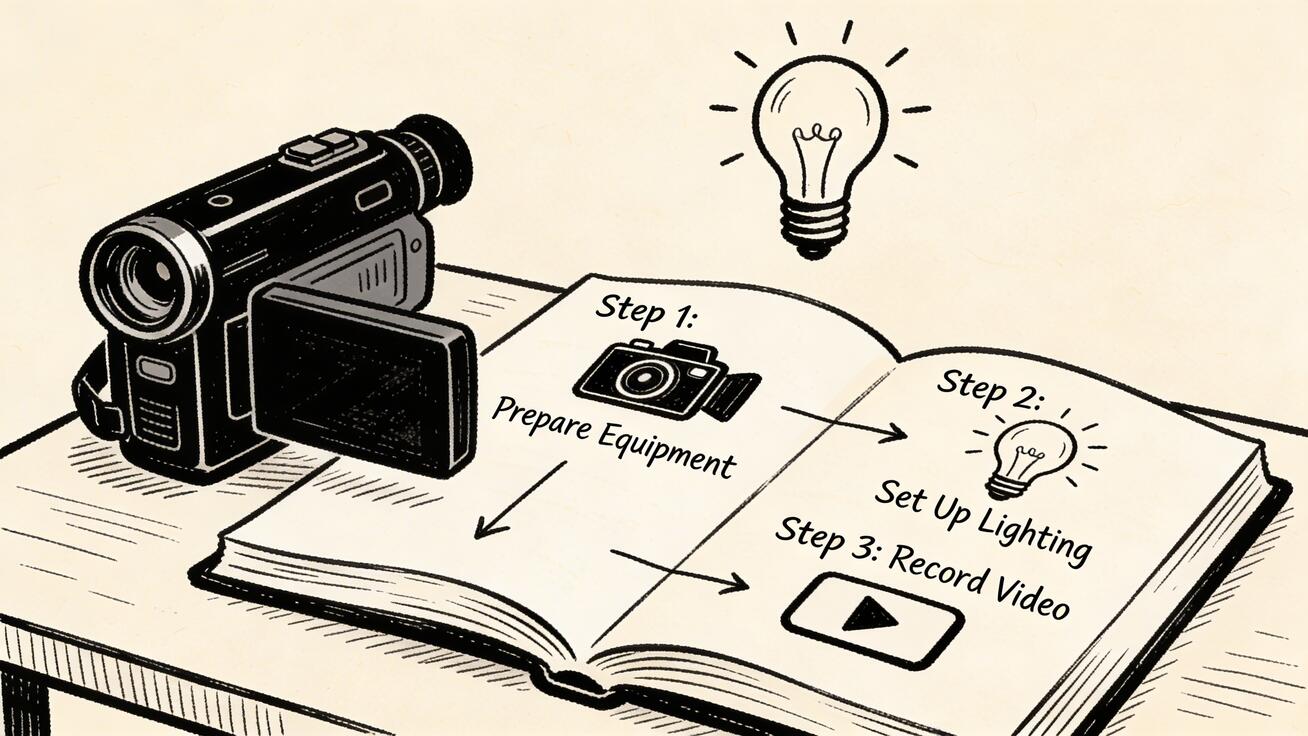
Step 2: Your First Video Generation
The Basic Workflow
- Write your prompt — Describe the scene you want to generate
- Set parameters — Choose duration, aspect ratio, and any style settings
- Generate — Submit and wait (typically 40-90 seconds for Veo 3 Lite)
- Review and iterate — Watch the output, identify what to improve
- Refine and regenerate — Adjust the prompt and generate again
Your First Prompt
Let's start with a simple, clear prompt that showcases Veo 3 Lite's strengths:
"A coffee cup steaming on a wooden table by a rainy window, cozy morning atmosphere, soft natural light, cinematic close-up, 4K"
This prompt works well because:
- It describes a single, clear scene (not multiple complex elements)
- It specifies mood and atmosphere (cozy, morning, soft light)
- It includes a camera instruction (close-up)
- It's concrete, not abstract
What to Expect
For this prompt, you should receive an 8-second clip showing:
- A realistic coffee cup with visible steam
- Rainy window background in soft focus
- Natural, warm lighting
- Smooth, believable motion (steam curling, rain droplets)
If you get something different from what you expected, that's normal for a first generation. The refinement process is where the real skill development happens.
Step 3: Writing Effective Prompts
Prompt writing is the core skill for working with Veo 3 Lite. Poor prompts produce mediocre results; excellent prompts unlock the model's full potential.
The Anatomy of a Great Veo 3 Lite Prompt
A well-structured prompt includes these elements (not all required every time, but important to know):
[Subject] + [Action] + [Environment] + [Style/Mood] + [Camera] + [Technical]
Example:
"[Subject] A professional chef [Action] expertly slicing vegetables [Environment] in a modern commercial kitchen with stainless steel appliances [Style/Mood] professional, clean, vibrant colors [Camera] medium shot, slight push-in movement [Technical] 4K, 8 seconds"
Key Prompt Components
Describing Your Subject
Be specific about what's in the scene:
- ✅ "A young woman with short auburn hair wearing a blue windbreaker"
- ❌ "A person outside"
The more specific you are about your subject, the more reliable and consistent the output.
Specifying Action and Motion
Veo 3 Lite excels at interpreting motion descriptions:
- "slowly rotating," "walking briskly," "gently swaying"
- "exploding outward," "gradually dissolving"
- "birds suddenly take flight," "clouds racing across the sky"
Active, dynamic prompts typically produce more engaging video than static or vague motion descriptions.
Setting the Environment
Context helps the model understand what "correct" physics, lighting, and atmosphere look like:
- "on a fog-covered mountain at sunrise"
- "in a neon-lit Tokyo alley at night during rain"
- "in a sunlit Mediterranean kitchen with tiled floors"
Camera Instructions
Veo 3 Lite responds well to cinematic camera language:
- Shot types: "close-up," "medium shot," "wide shot," "aerial shot," "low angle," "overhead"
- Camera movement: "slow push-in," "orbit around subject," "handheld," "crane shot," "dolly in"
- Lens effects: "shallow depth of field," "wide angle distortion," "telephoto compression"
Style and Mood
Visual style descriptors guide the overall aesthetic:
- Realism: "photorealistic," "documentary style," "news footage"
- Cinema: "cinematic," "film noir," "golden hour," "blockbuster"
- Art styles: "impressionist painting style," "watercolor aesthetic," "anime style"
- Mood: "eerie and unsettling," "joyful and vibrant," "melancholic and quiet"
Step 4: Advanced Prompt Techniques
The "Because" Method
When you know why you want something, add it to the prompt. The model can better optimize the generation when it understands the intent.
Instead of:
"A close-up of a coffee cup"
Try:
"A close-up of a coffee cup steaming, to convey warmth and morning routine, soft natural light emphasizing the steam wisps"
Negative Prompting (Where Available)
Some interfaces allow negative prompting — telling the model what NOT to include. This is useful for avoiding common artifacts:
Negative prompt examples:
- "no text," "no watermark," "no people," "no bright colors"
- "avoid blurry motion," "no jump cuts," "no lens flares"
Check if your access platform supports negative prompting in the parameters.
Scene Continuity Prompts
When creating multi-clip sequences, maintain continuity by keeping core elements consistent across prompts:
Clip 1: "A young woman with a red jacket standing at a city crosswalk, daytime, overcast sky, medium shot"
Clip 2: "The same young woman with a red jacket now walking through a park, similar overcast light, medium shot, continuous feeling"
The phrase "same [element]" signals to the model that you need consistency with a previous clip.
Prompt Amplifiers
Certain phrases reliably improve output quality in Veo 3 Lite:
- "8K detail," "ultra high definition" — increases fine detail
- "award-winning cinematography" — elevates visual quality
- "professional lighting," "studio quality" — improves lighting coherence
- "smooth motion," "stabilized shot" — reduces motion artifacts
- "photorealistic," "physically accurate" — improves realism
Step 5: Using Image-to-Video Mode
Veo 3 Lite's image-to-video capability lets you animate a still image. This is one of the most powerful features for creators who already have visual assets.
How Image-to-Video Works
- Upload a reference image — This becomes the starting frame of your video
- Write an animation prompt — Describe how the scene should move
- Generate — The model creates motion that's consistent with your image
Image-to-Video Use Cases
Product Animation:
- Upload a product photo
- Prompt: "Slowly rotate around the product, studio lighting, white background"
- Result: A dynamic product video without a photo shoot
Portrait Animation:
- Upload a portrait photo
- Prompt: "Subtle head movement, natural blink, slight smile, realistic breathing"
- Result: A lifelike animated portrait
Landscape Animation:
- Upload a scenic landscape photo
- Prompt: "Clouds moving across the sky, water rippling gently, birds in the distance"
- Result: A living landscape from a still photo
Art Animation:
- Upload a digital painting or illustration
- Prompt: "Animate in the style of the artwork, subtle magical movement, fireflies appearing"
- Result: An animated version of your artwork
Tips for Better Image-to-Video Results
- Use high-resolution input images — The model works better with more detailed input
- Describe motion that makes physical sense — The model has a model of physics
- Keep motion subtle for portraits — Heavy motion on faces can create artifacts
- Specify motion direction — "clouds moving left to right," "water flowing down"
Step 6: Audio Generation with Veo 3 Lite
Unlike most AI video tools, Veo 3 Lite includes audio generation capabilities. While limited compared to full Veo 3, the audio features can dramatically enhance your videos.
Getting Good Audio Results
Mention audio elements in your prompt:
"A waterfall in a mountain forest with the sound of rushing water and birdsong, dappled sunlight"
By including audio-relevant elements (the waterfall, birds) explicitly in your prompt, you help the model understand what audio to generate.
Specify atmosphere for ambient sound:
"A busy city street at rush hour, cars honking, crowd noise, sirens in the distance"
For music-like audio:
"A dramatic orchestral score builds as the camera pans across a stormy mountain landscape"
Audio Limitations to Be Aware Of
- Speech quality varies — Complex dialogue isn't reliably generated
- Audio sync in complex scenes — Multiple simultaneous audio sources can become muddled
- Post-production recommendation — For professional projects, generate the visual first, then add professional audio in post
Step 7: Building a Production Workflow
For creators who want to produce content consistently at scale, a systematic workflow is essential.
The 5-Stage Veo 3 Lite Production Pipeline
Stage 1: Concept Development (10 minutes)
- Identify the goal of your video
- Define subject, action, environment, and style
- Draft 2-3 prompt variations to test
Stage 2: Rapid Prototyping (20-30 minutes)
- Generate quick tests of your key prompts
- Evaluate: Does the output match your creative intent?
- Make notes on what worked and what needs adjustment
Stage 3: Refined Generation (20-40 minutes)
- Apply insights from prototyping
- Generate the final clips for your project
- Create multiple variations of key clips for editing flexibility
Stage 4: Post-Production (Variable)
- Edit clips in your video editor (Premiere, DaVinci Resolve, etc.)
- Add music and sound effects as needed
- Apply color grading if required
- Add text, graphics, or branding elements
Stage 5: Review and Optimize (10 minutes)
- Watch the final product critically
- Note what worked well for future prompts
- Identify any artifacts to avoid in future generations
Organizing Your Prompts
Create a prompt library that you can draw from and improve over time:
/veo3-lite-prompts/
  /nature/
    - waterfall-drone.txt
    - forest-morning.txt
    - ocean-sunset.txt
  /urban/
    - city-street-night.txt
    - coffee-shop-interior.txt
  /product/
    - product-rotation-white-bg.txt
    - product-lifestyle-kitchen.txt
  /people/
    - office-environment.txt
    - outdoor-portrait.txt
Maintaining this library lets you build on what works rather than starting from scratch each time.
Step 8: Troubleshooting Common Issues
Problem: The Video Doesn't Match My Prompt
Diagnosis: Usually a prompt clarity issue.
Solutions:
- Simplify the prompt — remove ambiguous elements
- Use more specific, concrete language
- Move the most important elements to the beginning of the prompt
- Try adding "clearly visible," "prominently featuring," or "focused on" before key elements
Problem: Motion Looks Unnatural or Artifacts Are Present
Diagnosis: Often caused by too-complex motion or conflicting physics in the prompt.
Solutions:
- Simplify the motion description
- Add "smooth motion," "physically accurate movement," or "fluid animation"
- Reduce the number of moving elements in the scene
- Generate at shorter clip length (4 seconds instead of 8)
Problem: Audio Quality Is Poor or Absent
Diagnosis: Audio isn't explicitly triggered in the prompt.
Solutions:
- Explicitly mention audio-producing elements (wind, music, voices, machinery)
- Add "with high-quality audio," "clear sound design," or "crisp sound effects"
- Consider generating without audio and adding audio in post-production
Problem: Output Resolution Looks Low
Diagnosis: May be a platform display or download issue, not a model quality issue.
Solutions:
- Download the full-resolution file rather than previewing in browser
- Check that you've selected 1080p output in settings (not a lower preview quality)
- Try a different browser or client if preview looks poor
Problem: Inconsistent Results for the Same Prompt
Diagnosis: AI models have inherent variability — this is normal.
Solutions:
- Use a seed value if the platform supports it (fixes randomness for reproducibility)
- Accept that some variation is expected and generate multiple times
- Build prompts that are more constrained to reduce variation space
Step 9: Platform-Specific Tips
Google AI Studio Tips
- Use the Run button carefully — Generations cost credits; preview the prompt before running
- Save your prompts — AI Studio lets you save prompt configurations; use this feature
- Adjust temperature — Lower temperature (0.5-0.7) produces more consistent, literal outputs; higher temperature (0.8-1.0) produces more creative variations
- Check quotas — Monitor your usage in the console to avoid unexpected quota exhaustion
Gemini App Tips
- Use conversational refinement — Ask Gemini to "make it more dramatic" or "change the setting to night" for iterative refinement
- Reference previous generations — Gemini tracks conversation context; you can ask for variations of a previous generation
- Combine with Gemini's image generation — Generate an image first, then animate it with video generation
Step 10: Use Case Tutorials
Tutorial A: Creating a Social Media Reel
Goal: Create a 15-second social media post (3 clips × 5 seconds each)
Step 1 — Define your story:
- Clip 1: Establishing shot (wide)
- Clip 2: Action shot (medium)
- Clip 3: Close-up detail (tight)
Step 2 — Write prompts for each clip:
Clip 1:
"Wide shot of a yoga practitioner beginning a sunrise practice on a mountaintop, golden hour light, distant mountains visible, cinematic, 5 seconds"
Clip 2:
"Medium shot of the same yoga practitioner moving through warrior pose, golden morning light, dynamic but controlled movement, 5 seconds"
Clip 3:
"Close-up of bare feet on a yoga mat outdoors, warm light, peaceful, detail-focused, 5 seconds"
Step 3 — Generate and edit:
- Generate all three clips
- Import to video editor
- Trim and sequence
- Add appropriate music (royalty-free or AI-generated)
- Export for platform
Step 4 — Platform optimization:
- Instagram/TikTok: Export 9:16 vertical
- Twitter/YouTube: Export 16:9 horizontal
- Instagram Square: Export 1:1
Tutorial B: Product Demonstration Video
Goal: Create a 30-second product demo for an e-commerce listing
Setup: Assume you're demonstrating a premium wireless headphone
Clip 1 — Hero shot (8 seconds):
"Premium wireless headphones floating against a clean dark background, product photography style, studio lighting with rim light, slowly rotating 360 degrees, 8K quality, 8 seconds"
Clip 2 — Lifestyle context (8 seconds):
"Young professional wearing premium headphones working at a modern desk, focused and content expression, natural window light, clean modern apartment, 8 seconds"
Clip 3 — Detail shots (8 seconds):
"Extreme close-up of premium headphones ear cup, showing material texture and build quality, product photography macro, rotating slowly, studio light, 8 seconds"
Assembly: Combine clips with smooth transitions, add brand music, overlay text specs, export for platform specifications.
Tutorial C: Educational Explainer Video
Goal: Create a 60-second explainer about climate change
Planning: Break the concept into 6-8 visual scenes that illustrate the topic
Clip 1 — Earth from space:
"Satellite view of Earth with thin atmospheric layer visible, beautiful and fragile, realistic space photography style, slowly rotating, 8 seconds"
Clip 2 — Industrial emissions:
"Industrial smokestacks emitting thick smoke against grey sky, documentary photography style, wide shot, serious tone, 6 seconds"
Clip 3 — Melting ice:
"Time-lapse style of Arctic ice shelf calving into ocean, dramatic scale, documentary nature footage aesthetic, 8 seconds"
Tip: For educational content, prioritize accuracy and clarity over visual spectacle. Simple, clear visuals communicate better than complex, hard-to-read scenes.
Advanced Techniques for Power Users
Cinematic Style References
Include cinematic references to achieve specific aesthetics:
- "in the style of National Geographic documentary"
- "like a Roger Deakins-lit scene"
- "Wes Anderson symmetrical framing and pastel palette"
- "Michael Bay-style action cinematography with lens flares"
The model has absorbed vast amounts of cinema and can approximate these styles.
Temporal Language
Describe the passage of time within the clip:
- "Starting with wide shot, slowly pushing in to close-up over 8 seconds"
- "Beginning in daylight, transitioning to golden hour"
- "Opening on stillness, then sudden action, then settling again"
Conditional Descriptions
Describe cause-and-effect relationships:
- "As the wind picks up, leaves begin to swirl and scatter"
- "The flower slowly opens as sunlight hits it"
- "Raindrops create ripples in the puddle as they fall"
These causal descriptions help the model generate more coherent, believable motion.
Conclusion: Mastering Veo 3 Lite
Mastering Veo 3 Lite is a journey, not a destination. The model is powerful, but unlocking its full potential requires practice, experimentation, and a systematic approach to prompt development.
The key principles to remember:
- Be specific — Vague prompts produce vague results
- Think in scenes — Each prompt is a mini screenplay
- Iterate quickly — Use Veo 3 Lite's speed advantage
- Build a prompt library — Learn from what works
- Combine with other tools — Post-production elevates AI video
- Stay curious — The model is constantly improving
As AI video generation continues to evolve, creators who invest in understanding these tools today will have a significant advantage tomorrow. Veo 3 Lite is one of the most capable, accessible tools in the current generation — start using it, start learning from it, and start creating.
The future of video content creation is here, and it's more accessible than ever.
This tutorial reflects Veo 3 Lite capabilities as of April 2026. Features and interface details may change as Google updates the product. Check Google's official documentation for the latest specifications.
Related Articles
Continue with more blog posts in the same locale.
Best Veo 3 Prompts 2026: Complete Guide to Cinematic AI Video Generation
Complete Veo 3 prompts guide 2026. Best prompt formulas, 50+ examples across categories, and advanced techniques for cinematic AI video output.
Read article
Veo 3 Lite Pricing 2026: Is It Free? Complete Cost Guide
Complete Veo 3 Lite pricing guide 2026. Is it free? Google One AI Premium cost breakdown, credit limits, and comparison with alternatives like Seedance.
Read article
How to Access Veo 3 Lite Through Google Gemini 2026: Complete Guide
Complete guide to accessing Veo 3 Lite through Google Gemini in 2026. Step-by-step setup, prompting tips, credit management, and comparison with alternatives.
Read article